
Cooking Marathon, reprise
- Joyous Sparks

- Jul 12, 2025
- 5 min read
Updated: Jul 17, 2025
Hello, and welcome back to Kitchen Adventures with Joy!
Last week's Cooking Marathon was a lot of fun, and so here I am again, with a whole bunch of things I made in an attempt to stem the flood of unhappy veggies in the fridge.
I believe we are all much happier now.
Onto the dishes!


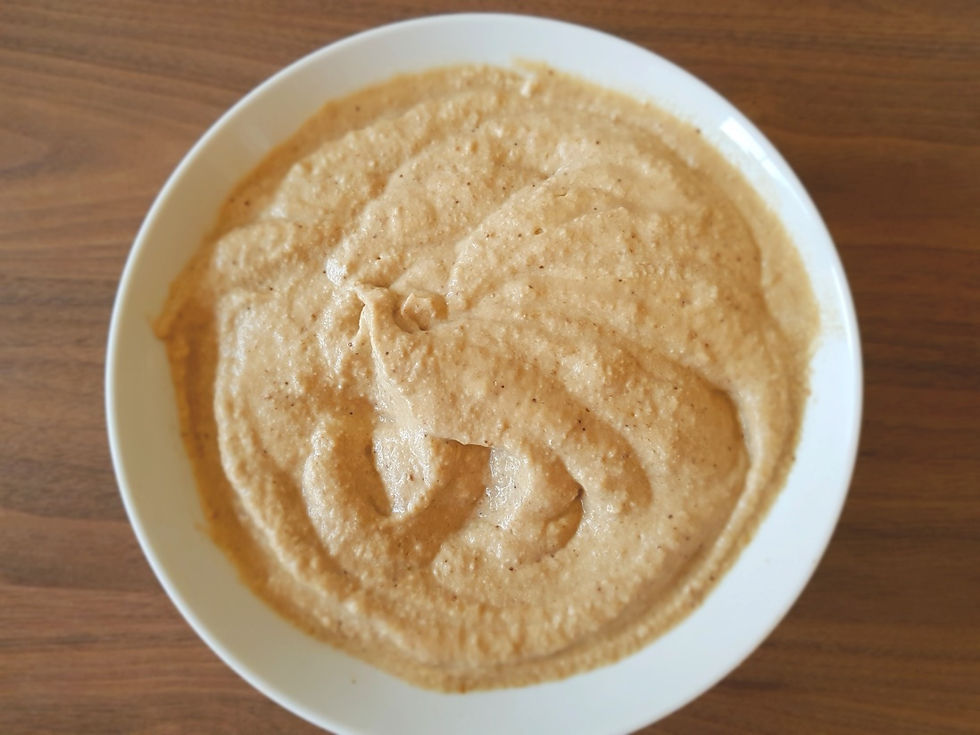
Beetroot dahl, Tandori masala style the Second
Because when Life gives you beetroot, you make beetroot dahl.
This week's version features black salsify, yellow lentils, and me learning the word black salsify. Cool stuff.
Very different texture to last weeks, probably because of the lentils. Much softer and mushy. Not bad! Not bad at all. Just different.
Which is nice. When a repeat-dish turns out different enough that it's almost as if you made a new one.
Original recipe is here, by the way. I simply keep changing it. 😃
Next one:

Another Asian inspired stir fry. This one features:
1 sad bok choy, 1 massive carrot, ginger and more ginger, more black salsify (I had a lot, okay?!), green beans, soy beans, millet, and a sauce made from tamari, rice vinegar, and lemon juice.
Might have been a bit much lemon juice. On the other hand? Perfect summer dish. Very tasty. Recommended.
Recipe? Uuh ...
Step One:
Chop veggies into small bits.
There wasn't enough left of the bok choy to seperate the harder white parts from the leafy green parts. They all went in together this time.
Step Two:
Chop garlic, ginger and onion.
Quantities? Look use how ever much ~ or little ~ you want. I like lots of all three, you might not. So go with what feels right for you.
Step Three:
Cook millet according to instructions on packaging.
Pay attention to the bloody thing, so that it doesn't boil over.
(They always do, ugh, there is too much energy in my tiny kitchen ...)
Step Four:
Heat oil in pan ~ I used coconut again ~ and sauté onion, garlic and ginger.
Add veggies and sauté? stir-fry? the whole lot.
Step Five:
Rescue the millet from burning.
Step Six:
Then dig some frozen green beans from the freezer and throw into pan.
Reduce heat under pan, pop lid on and let cook gently until veggies all soft.
(No idea how long that took, sorry, wasn't paying attention to the clock ...)
Step Seven:
Once veggies are soft, add tamari, rice vinegar, and lemon juice.
Again, quantities up to you ~ I used a good strong splash of tamari, three teaspoons of vinegar and the juice of half a lemon.
Step Eight:
Stir in millet, and let gently simmer for a bit.
Done!
Step Nine:
Deep clean the stove top from all the spillage.
Ahem.
Moving on.
Then, because there were still more black salsifys - salsifies? - some root veggie "fries"

Generously seasoned with a spice blend that I can't remember the name of, sorry. Use whatever spices/spice blend you like!
They were in the oven at 240°C / 464°F for 40 minutes, because I made them together with the aubergines for:
Mutabbal, an oriental dip made from aubergines.
The original recipe called for one (1) (!) clove of garlic. But I will never forget the guy from South Africa who came to the first Openhand retreat on La Palma; he, as well as some others, me included, stayed on after the retreat, and we got together one evening for dinner. (My birthday, to be precise). And he made that dip, saying: "They tell you to use one or two cloves, because of the garlicy smell. Yeah. I used six. It's not any worse, and tastes better."
Or something to that extend, anyway. And he was right, it tasted very good! And since we all ate it ... 😃
Anyway, I used one big clove of garlic and when I tried to get a second one, four tiny ones popped off, and so I used those.
Lotsa garlic. Very nommy.
Recipe:
2 aubergines
4 tablespoons tahini
4 tablespoons Soy joghurt (I don't like the taste of soyjoghurt, so used coconut joghurt)
the infamous clove of garlic
1 teaspoon salt
2 tablespoons lemon juice
Step one:
Murder the aubergine. I mean, prick the skin. With a fork. (Or stab it, with a knife.)
Step Two:
Put aubergines on a grill? rack? dictionary is unclear, and pop in the oven for 40 minutes at 240°C / 464°F
Step Three:
When cooked, take aubergines from oven, place in a bowl, cover lightly, and let cool down a little.
Step Four:
Fight the little $§%!* to get their skin off.
Step Five:
Throw all ingredients in jug blender or food processor and blend until smooth.
Enjoy!
And last but not least, because there was still a sad zuchhini in the fridge:

Zucchini lasagna, with a filling made from sweet corn, kidney beans, and chunky tomatoes from a can. Oh, yeah, and vegan cream, mixed with nutritional yeast, on top.
Usually I don't buy the vegan "replacement" products, because more often than not, the ingredients list reads like Juniors First Chemistry Set. But then, my discounter of choice had this on offer, the ingredients are semi-okay, and also, I am curious and wanted to try it.
And then the poor thing sat in the fridge for aaaages, the Best Before date was long gone, so I felt to add it. And it's good!
... Yes, I totally use food that is past it's Best Before date. Because it says BEST Before and not "Thou Shalt Die Consuming This On The Very Next Day". Also? If it looks okay, smells okay, tastes okay - why throw it away?
Food waste and its prevention is a big thing for me. Something I am passionate about and do my little thing, in any way I can, to help: not throwing food away if it's still good, even if past the Best Before date; buying food that's been reduced in the shops due to imminent Best Before date; and subscribing to the etepetete Mix box - where wonky veggies are rescued and then delivered to yout doorstep.
This, by the way, is also where all the veggies you see pictured above came from. 😃
Recipe? Hmm ...
1 big boy zucchini
1 can of kidney beans
1 jar of sweet corn
1 can of chunky tomatoes (choppes tomatoes? whatever)
200ml (roundabouts) of vegan cream
3 teaspoons nutritional yeast
salt, pepper, chilli flakes, whatever you wanna thro in
Step One:
Wash and chop the zucchini into "lasagna"-plates-style slices. Depends on the shape of your zuchhini and form of your oven dish. I chopped mine in half, and then sliced length-wise. That way, they fit perfectly into my dish.
Step Two:
Mix vegan cream with nutritional yeast and cover the bottom of the dish in a thin layer.
Step Three:
In a bow, mix sweet corn, tomatoes, kidney beans, and whatever spices you wanna use.
Step Four:
Layer zucchini and filling, finish with a zucchini layer.
Step Five:
Put rest of vegan cream-with-yeat on top.
I had, like, one generous tablespoon filling left, so mixed that into the cream.
Step Six:
Goes into the oven until done.
Ugh, don't ask me, 35 minutes at 200°C / 395°F? Maybe?
Depends on your oven, your zucchini, the dish ... possibly the weather and also the alignment of Pluto to the kitchen sink. Or something.
When the liquid in the dish has been bubbling for a while, and the top looks gently golden brown, then your lasagna is done.
And that's it for this week!
No dessert, because I also rescued a 1kg box of Medjoul dates and they are so good that I don't need any other dessert.
I only might need to go and buy more, the box is almost empty, this is not good ...


Comments